Email receipts to RenoJira
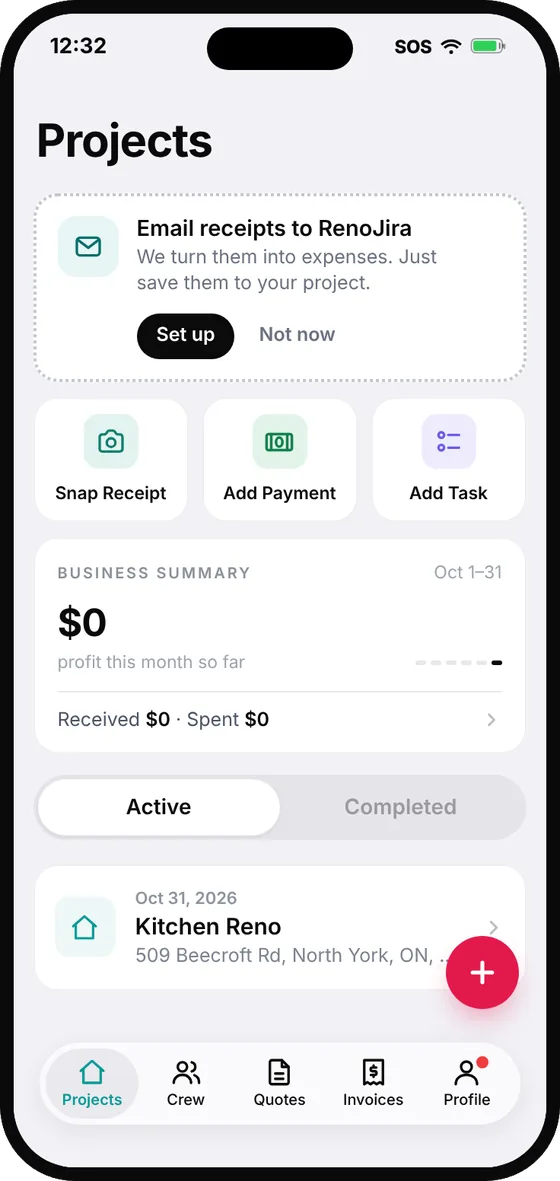
Forward receipt emails to your private RenoJira address. We turn each one into an expense — you just pick the project and save.
Supplier receipts, online orders, and invoices often arrive by email. Instead of downloading and re-uploading them, forward them to your own RenoJira address. We read each receipt and turn it into an expense ready for you to review.
How it works
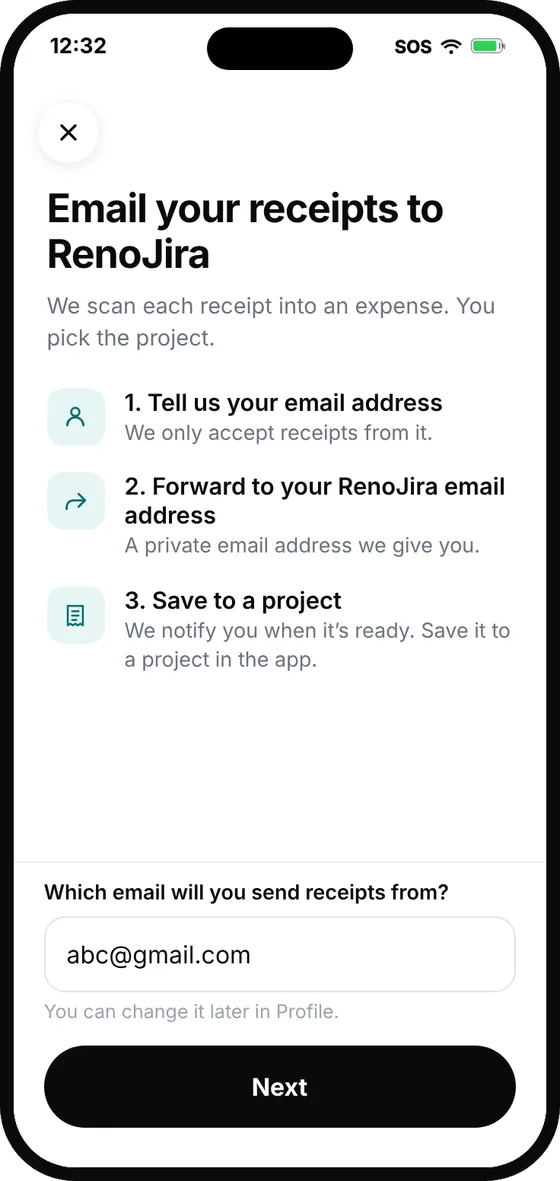
- Tell us your email. Pick the email you'll forward receipts from. We only accept receipts sent from it.
- Forward receipts. Send receipt emails to the private receipts address we give you.
- Save to a project. We let you know when a receipt is ready. Pick the project and tap Save.
Step 1: Start setup
- 1Open Projects.
- 2On the Email receipts to RenoJira card, tap Set up.
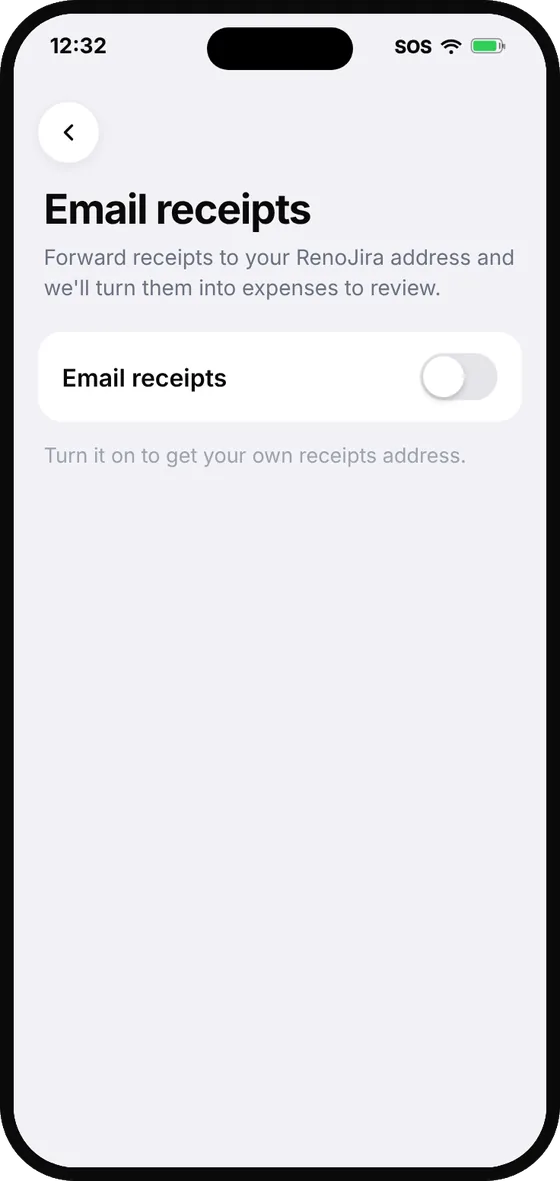
Don't see the card? Go to Profile → Email receipts and turn on the switch instead.
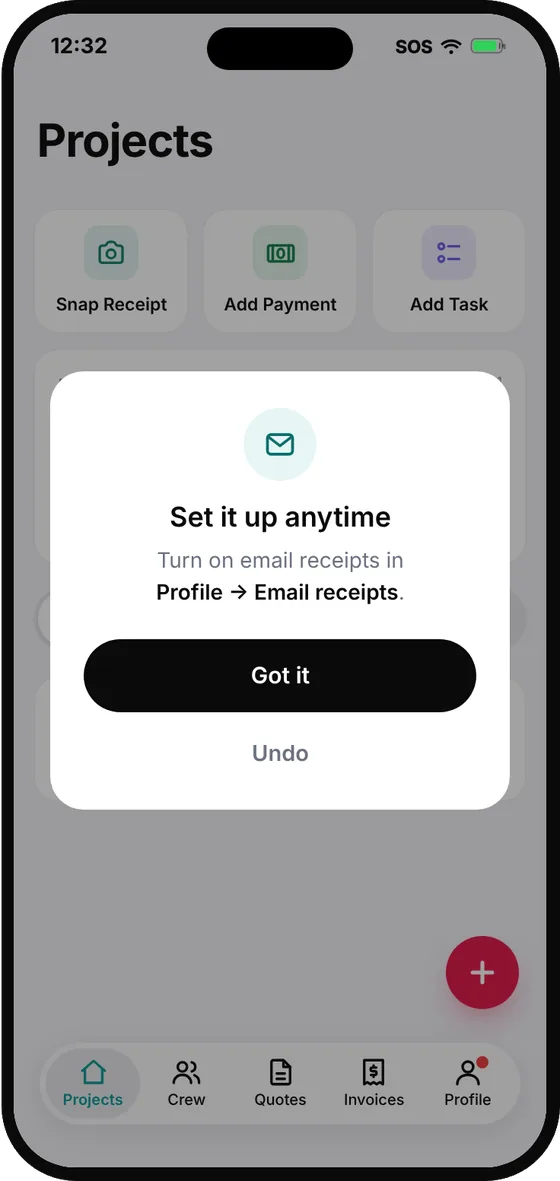
Not ready yet?
Tap Not now to hide the card. You can set it up anytime in Profile → Email receipts. Tap Undo if you change your mind right away.
Step 2: Choose the email you'll send from
- 1Under Which email will you send receipts from?, check the email. It starts as your account email — change it if your receipts arrive at a different inbox.
- 2Tap Next.
- 3We send a 6-digit code to that email. Enter it to confirm the email is yours.
Can't find the code? Check your spam folder, or wait a moment and send a new one.
Step 3: Copy your receipts address
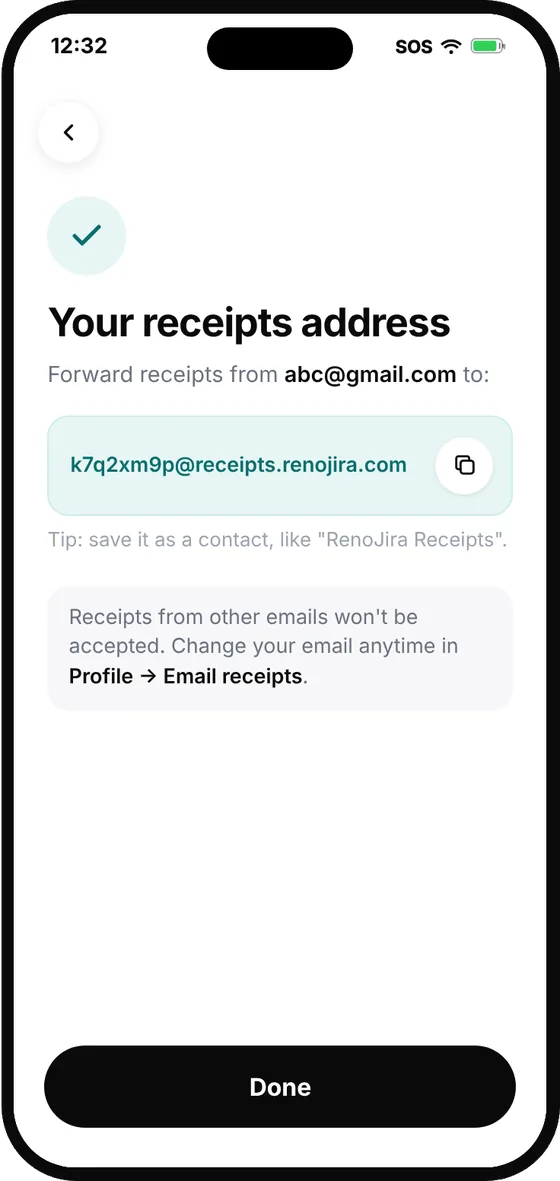
- 1Tap the copy button next to your receipts address. It looks like [email protected] — the first part of your login email.
- 2Save it as a contact in your email app, like "RenoJira Receipts", so it's quick to pick when forwarding.
- 3Tap Done.
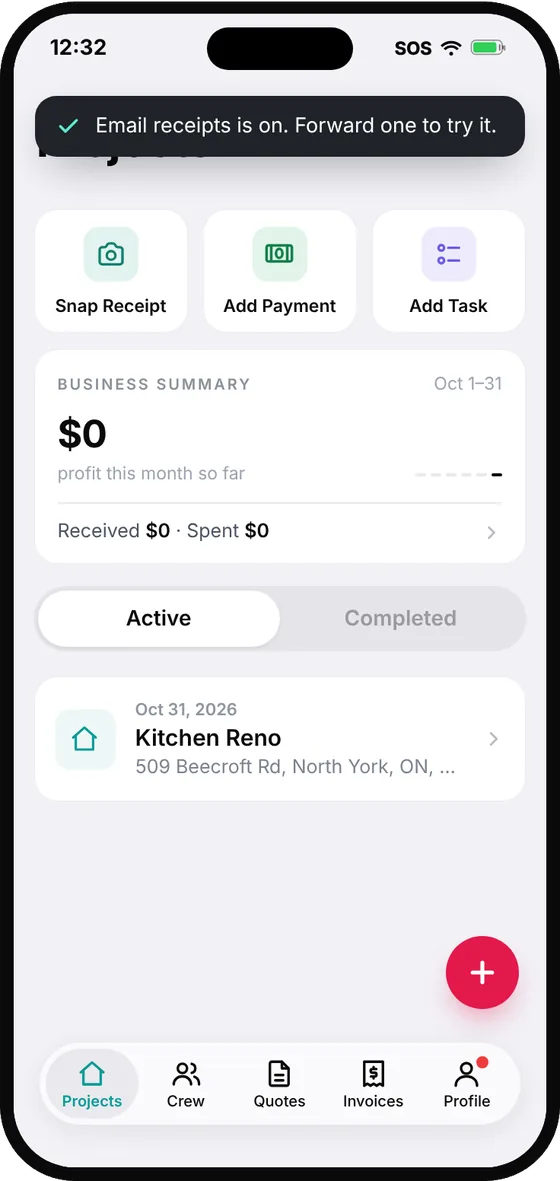
You're back on Projects with the message Email receipts is on. Forward one to try it.
Step 4: Forward a receipt
From the email you verified, forward any receipt email to your receipts address — just like forwarding to a coworker.
- Attach the receipt as a PDF, JPG, or PNG. Text in the body of the email isn't read.
- You can attach up to 3 receipts in one email.
- Emails from any other address are ignored.
We read the vendor, amount, date, and payment method, and keep the original file attached. We notify you when it's ready to review.
Step 5: Review and save to a project
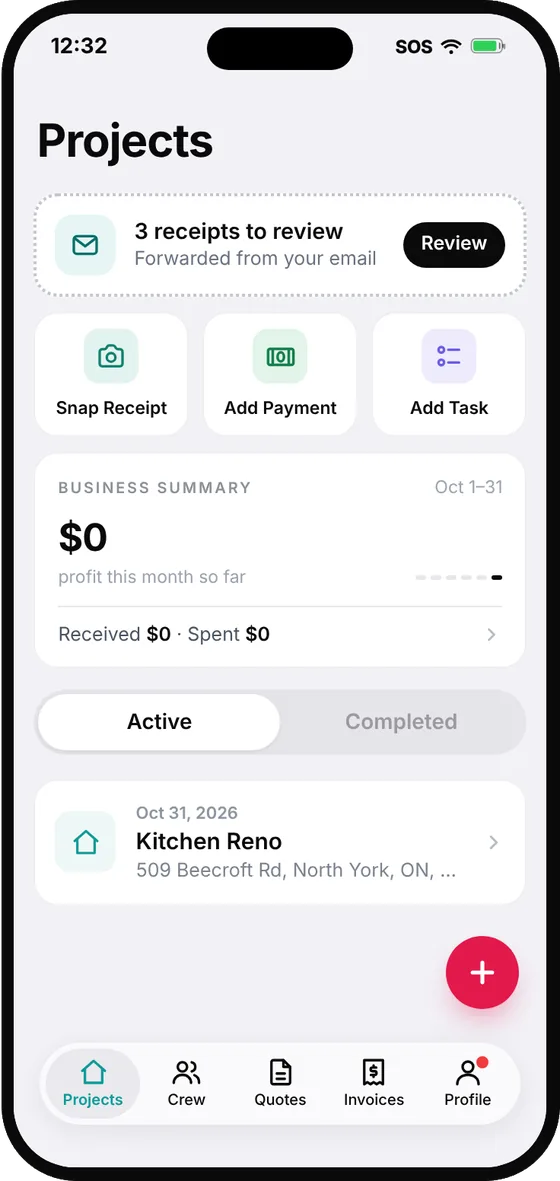
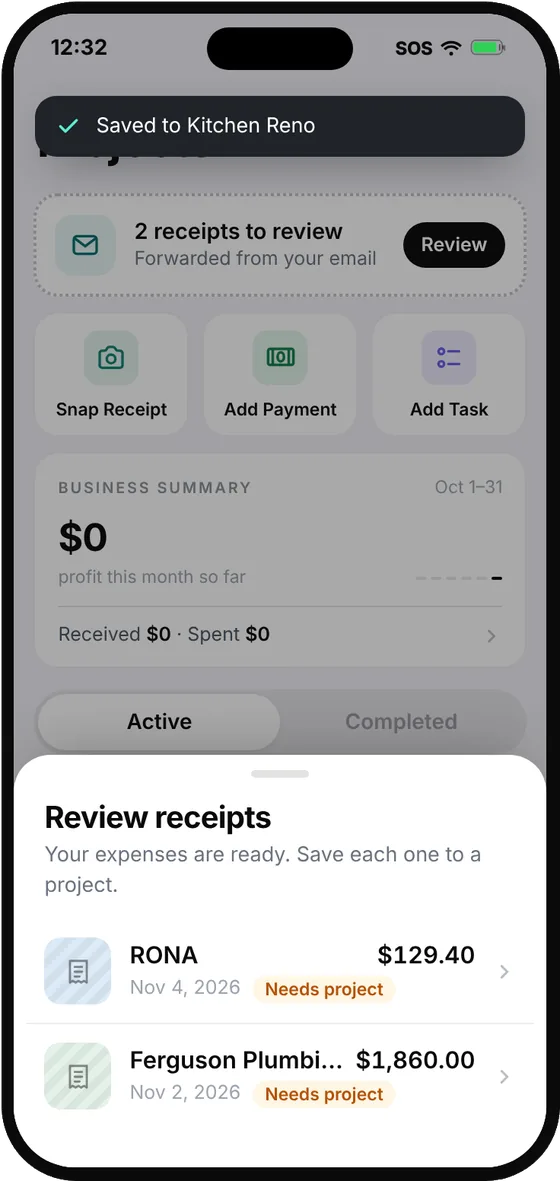
- 1On Projects, the receipts to review card shows how many are waiting. Tap Review.
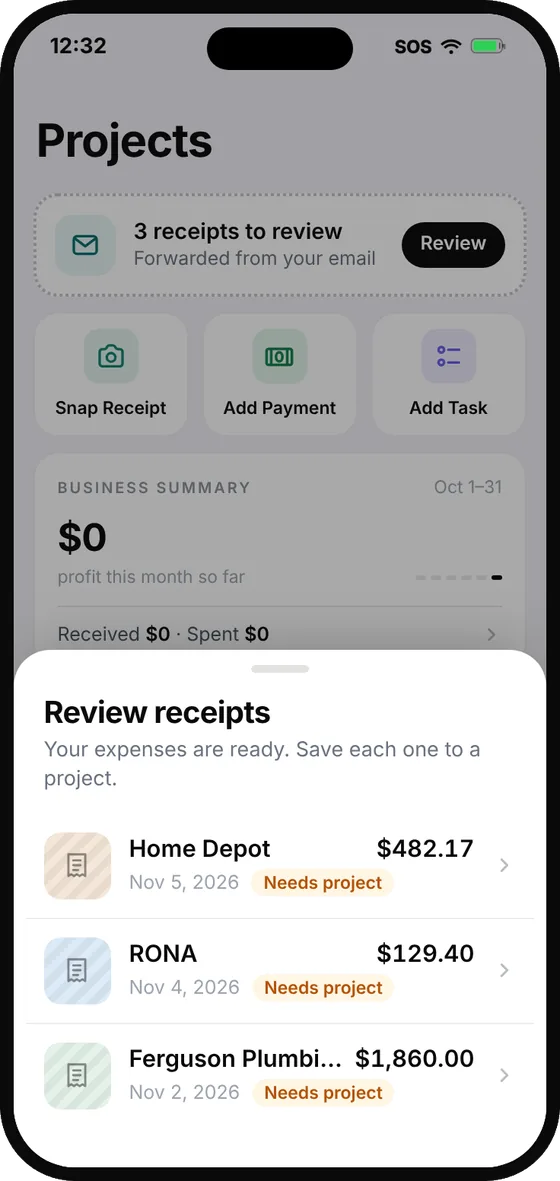
- 2Each receipt shows the vendor, amount, and date with a Needs project tag. Tap one to open it.
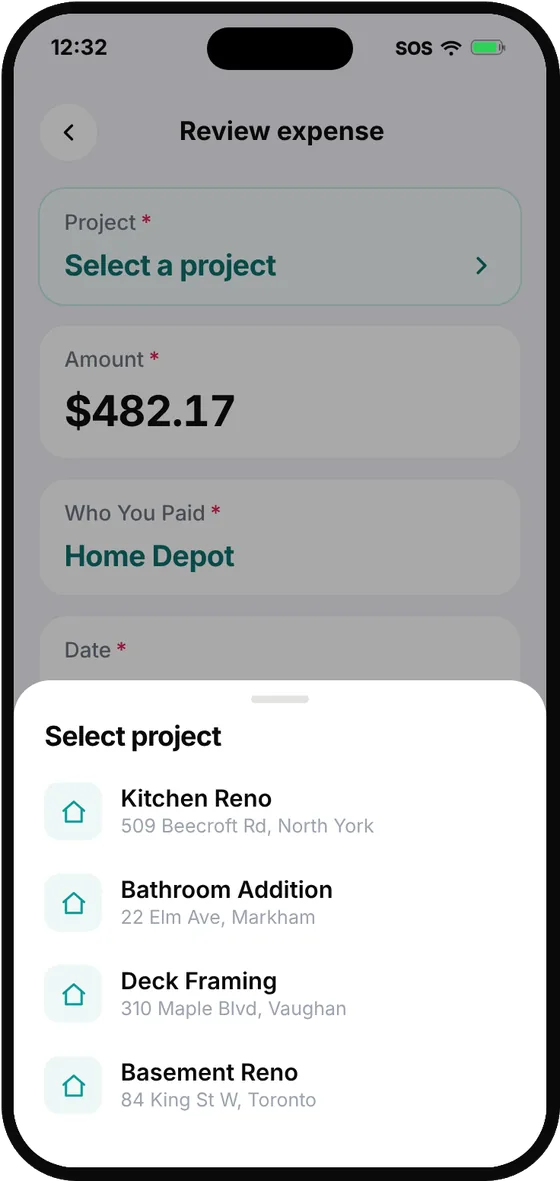
Pick the project
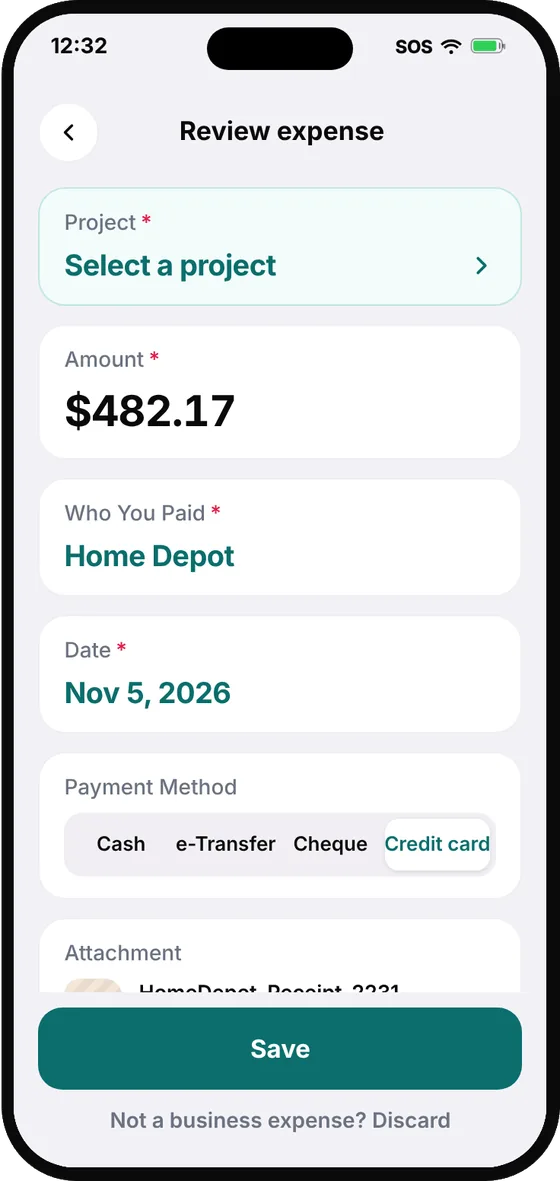
- 1Tap Project — it's the first field, highlighted until you choose one.
- 2Pick the project from the list. Each one shows its address so you can tell similar jobs apart.
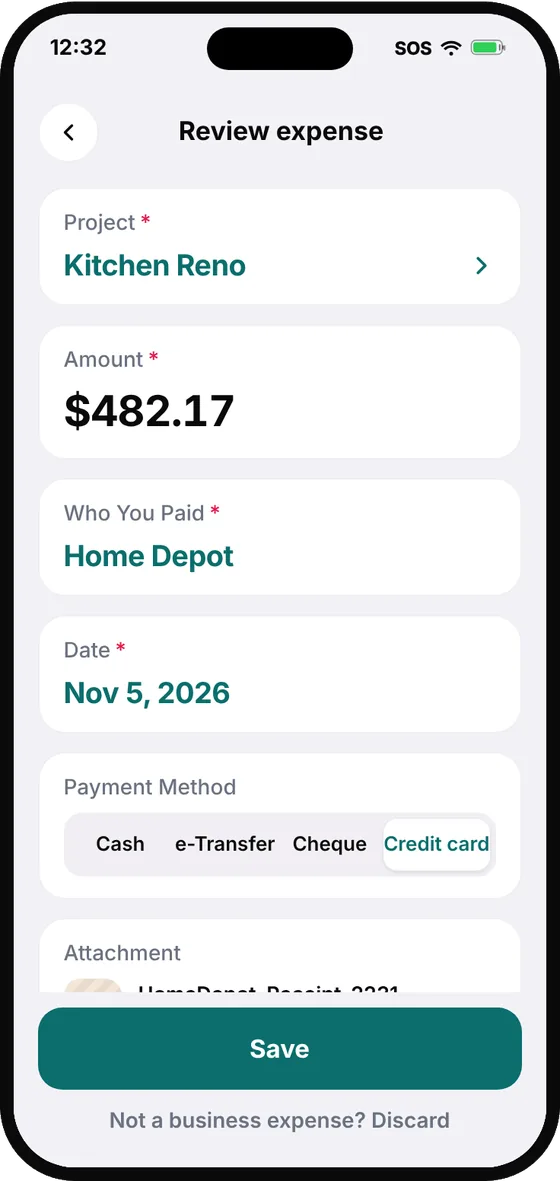
- 3Check Amount, Who You Paid, Date, and Payment Method. Fix anything that's off.
Under Attachment, the original file is marked Forwarded by email. Tap View to compare it with the details.
Save it
- 1Tap Save.
- 2The expense is added to that project with the receipt attached, and you'll see Saved to and the project name.
- 3Keep going with the next receipt in the list.
When the last one is saved, you'll see All receipts saved and the review card goes away.
Forgot to pick a project?
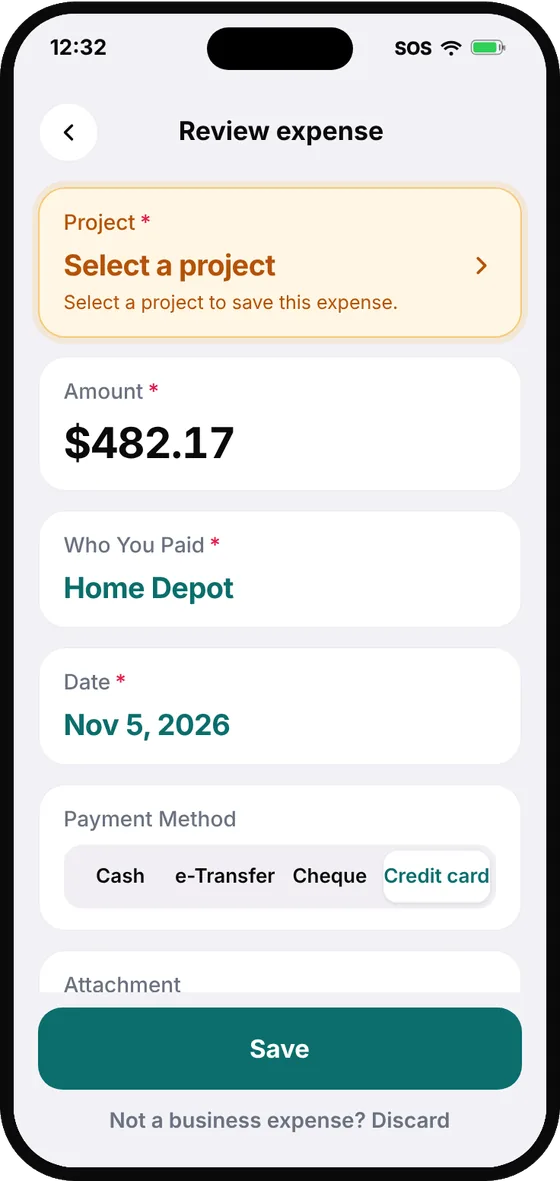
If you tap Save without a project, the Project field turns orange with Select a project to save this expense. Pick one and tap Save again.
Not a business expense?
Tap Discard under Save to remove it from the list. Nothing is added to any project.
Manage email receipts
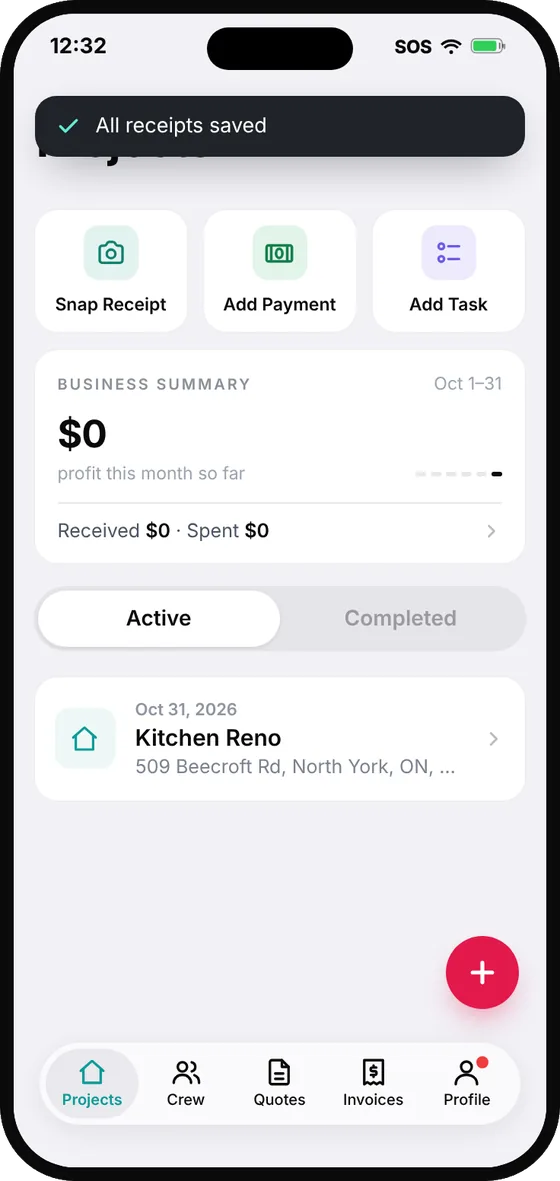
- 1Go to Profile.
- 2Under Integrations, tap Email receipts. It shows On or Off.
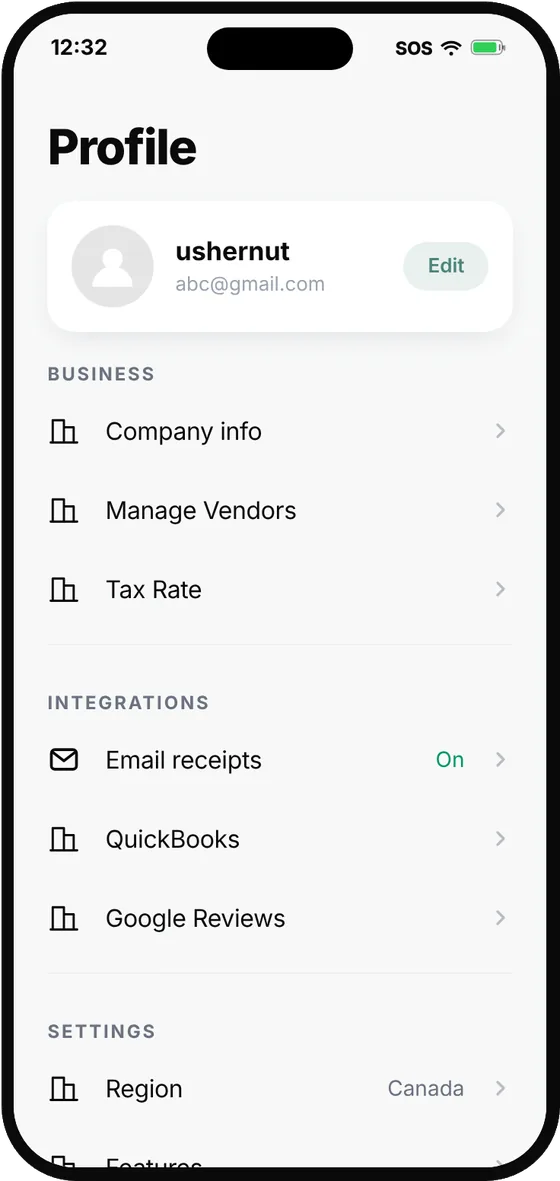
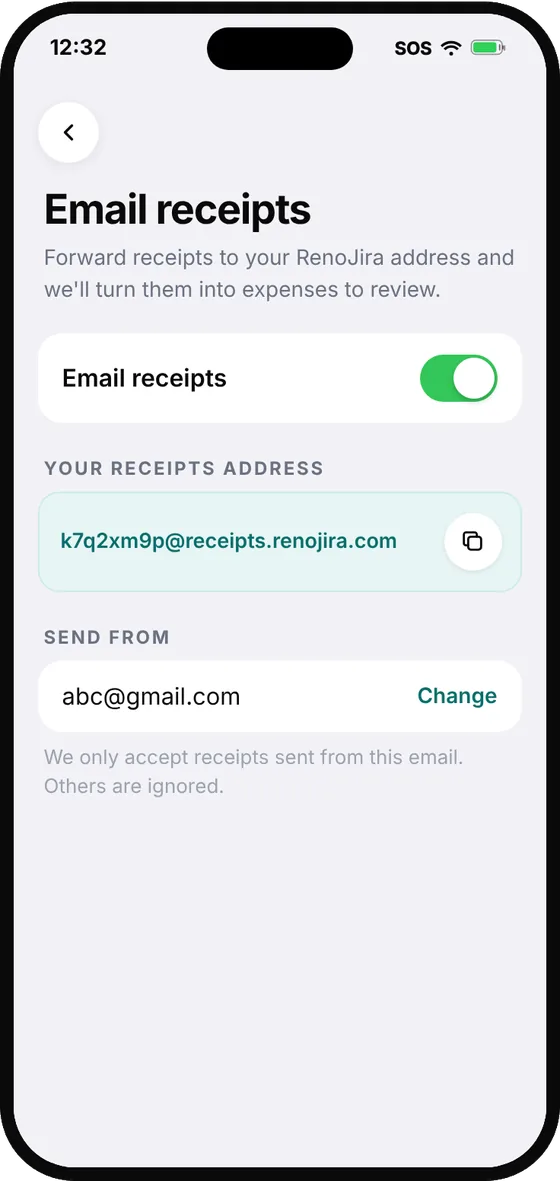
Here you'll find the on/off switch, Your receipts address with a copy button, and Send from — the one email we accept receipts from.
Change the email you send from
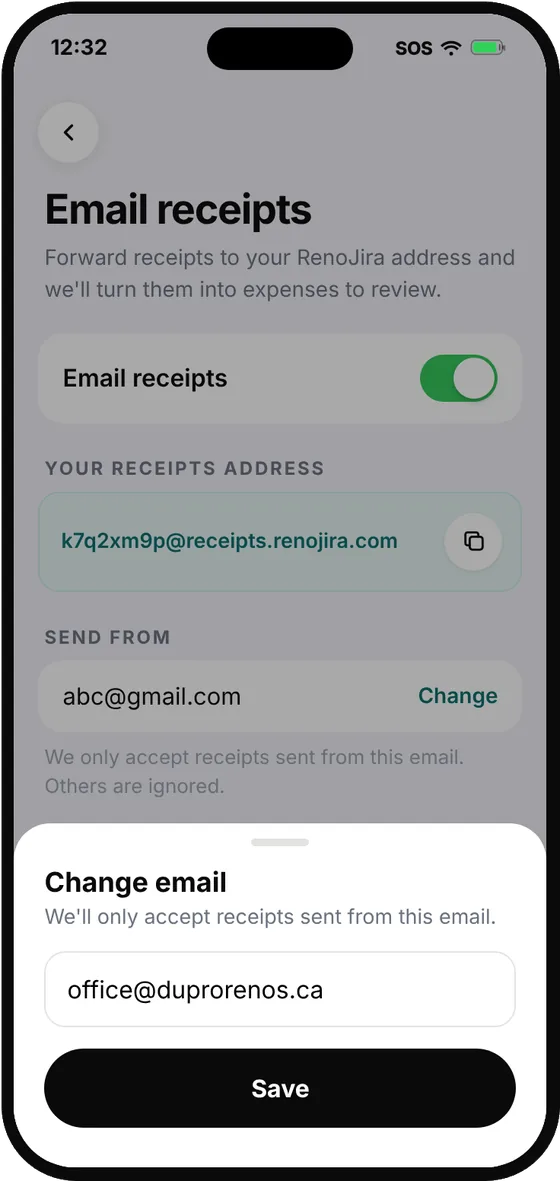
- 1In Profile → Email receipts, tap Change next to Send from.
- 2Enter the new email and tap Save.
- 3Enter the 6-digit code we send to the new email.
Your old email keeps working until the new one is verified, so you won't miss any receipts.
Turn email receipts off
Turn off the Email receipts switch to stop accepting forwarded receipts. Turn it back on anytime — your receipts address stays the same.
Expenses you've already saved stay on their projects.
Frequently asked questions
What address do I forward receipts to?
Your own private receipts address, shown during setup and anytime in Profile → Email receipts. It uses the first part of your login email — for example, [email protected] gets [email protected]. If that name is already taken, we add two digits, like [email protected].
Why didn't my forwarded receipt show up?
Check that you forwarded it from the email listed under Send from in Profile → Email receipts — mail from any other address is ignored. The receipt must be attached as a PDF, JPG, or PNG; text in the body of the email isn't read. Also make sure Email receipts is turned on.
Does RenoJira add the expense to a project automatically?
No. Each forwarded receipt waits as a draft until you review it, pick the project, and tap Save. Nothing is added to a project, your totals, or your profit until then.
Can I send receipts from more than one email?
One sending email at a time. Change it anytime in Profile → Email receipts → Change — your old email keeps working until the new one is verified.
If I turn it off and on again, does my address change?
No. Turning Email receipts back on keeps the same receipts address, so saved contacts keep working.